Soloing Gilded Precept Lost Sector in Destiny 2: Quick and Easy Guide (2026)
Hey there, Guardians! It's 2026, and I've been running Lost Sectors since the Red War days, but there's one that never gets old: Gilded Precept in Ahimsa Park. Whether you're grinding for that Winterbite Exotic Glaive from the Strider quest or just want to knock out a quick Legend solo, this Lost Sector is an absolute breeze—way easier than Hydroponics Delta or the other Neomuna options. I'm going to break it all down for you, from finding that sneaky entrance to cheesing the boss like a pro. Ready? Let's roll.
Finding the Entrance – It’s Not As Obvious As You’d Think!
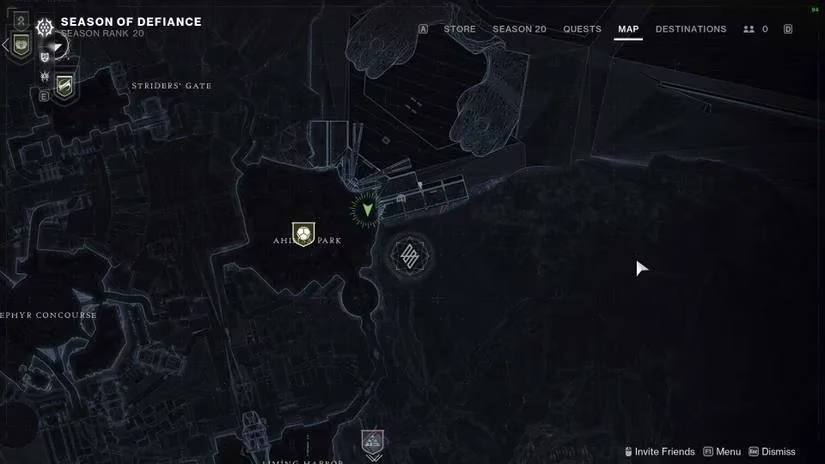
Alright, the first "challenge" is locating the dang entrance. Head to the east side of Ahimsa Park. You'll want to stand right where the green marker is on your map (trust me, it's near the edge). Look south, and you'll spot the Lost Sector symbol painted on a rock. But the real entry is a bit hidden. Check out the image below to get your bearings.
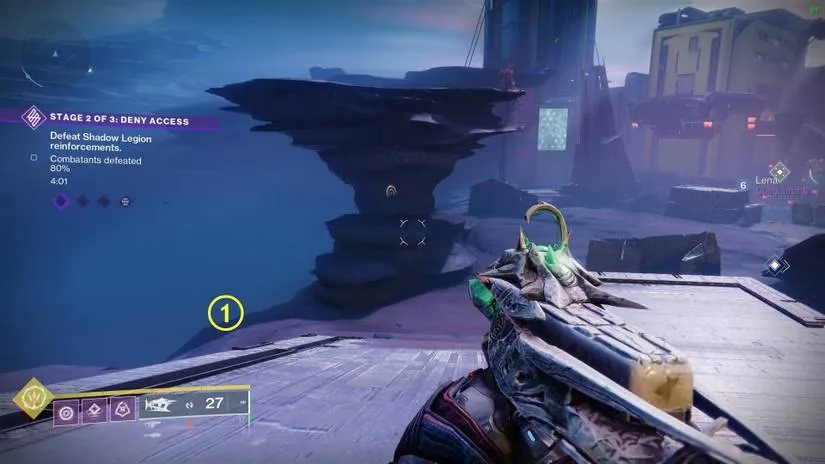
Now, stand at the spot marked "1" in the next image, right next to the Lost Sector sign. Peer down over the edge towards Calus's massive ship. You'll spot some boxes below and a narrow opening in the ship's hull. That's your way in! It's a bit of a leap of faith, but no sweat—just hop down and you're inside.
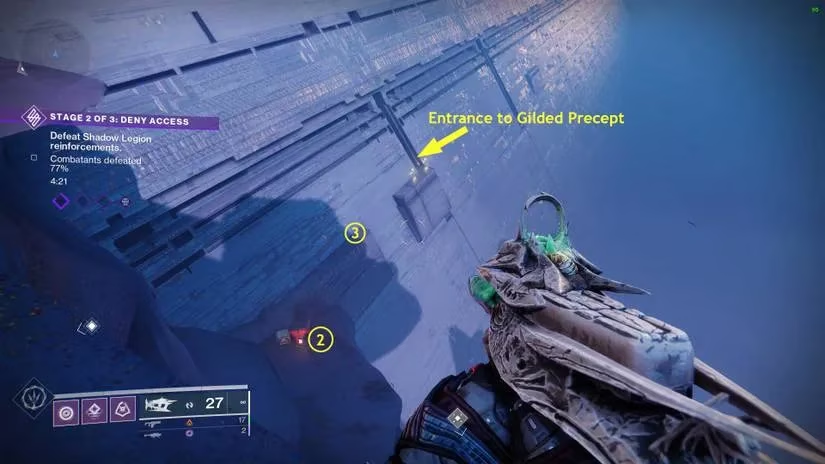
Once you're in, you've got three minor encounters before the big bad. Nothing too spicy, except for a tiny puzzle in the second room that'll have you saying "is that it?" by the end.
The Encounters – Walk in the Park
The enemies here are all Cabal, so plan your loadout accordingly. I'll dive into specific weapon recommendations later, but a machine gun or rocket launcher will serve you beautifully.
Encounter 1: Straightforward Slayfest
Right off the bat, you'll face an Honored Centurion and a bunch of Legionaries, Phalanxes, and Psions. Clear them out, and a door at the far end will open as you approach. Easy peasy. Then jump onto the corridor on the left to proceed.
Encounter 2: The "Puzzle" – Carry Bloom Shuffle
This is the only part that might trip you up if you're not paying attention. There are two platforms on either side, each holding an Honored Centurion and sniper Psions. Take down one Honored Centurion, and it'll drop a Carry Bloom. Grab it and dunk it into the lock at the far end of the room. Rinse and repeat for the other Centurion, and the door unlocks. Simple, right? I told you.
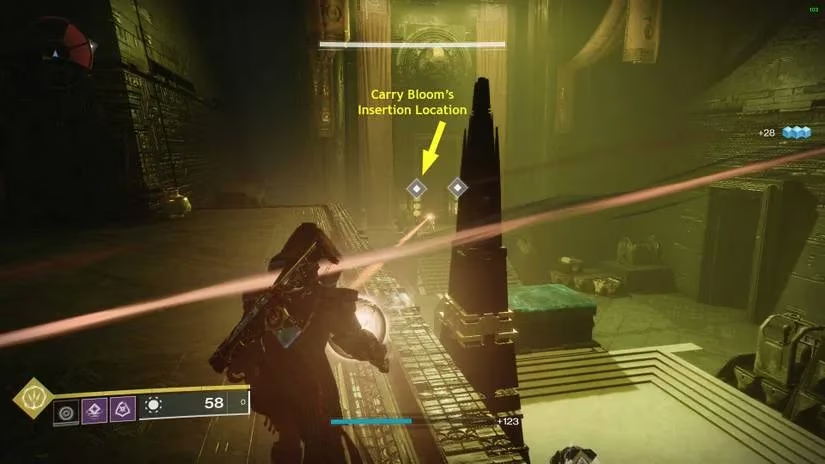
After that, head through the door, turn right, go downstairs, and another door opens for you. Inside, deal with one more Honored Centurion and you're ready to meet the boss.
Boss Fight: Valus Tharum, Gladiatorial Overseer
This guy is basically a Centurion with a fatter health bar. He doesn't have the high-jump slam that other Centurions love, which makes him a total pushover if you know where to stand. I've got a little cheese spot that'll have you laughing all the way to the loot chest.
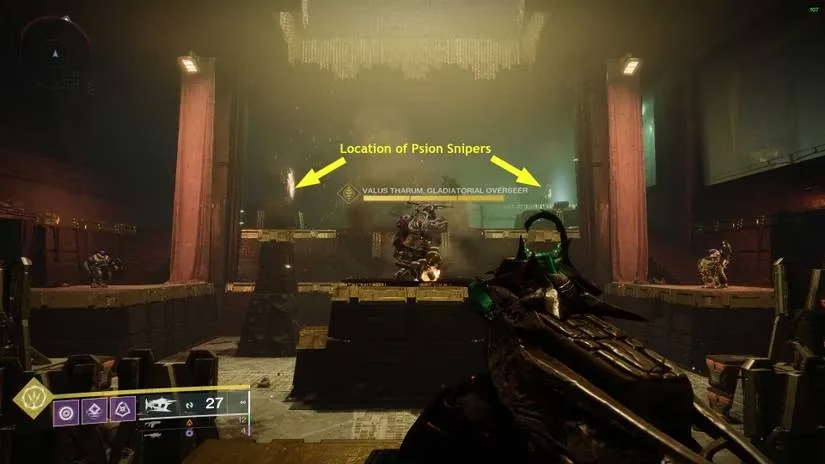
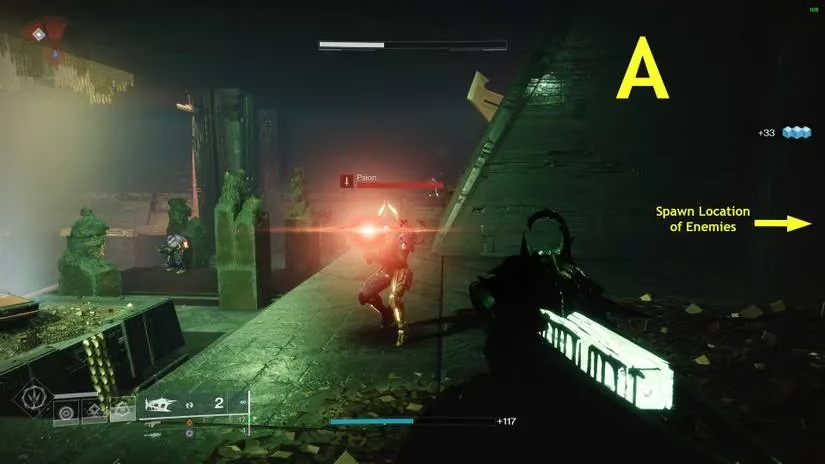
As soon as you enter the boss room, you'll see two sniper Psions perched in the far corners. Take them out immediately—they're your ticket to an easy win. Now, go stand in the spot where one of the snipers was. From there, the boss can't walk up to you. He'll just hang out underneath, letting you plink away at him with your heavy weapon while you occasionally step back to heal behind wall "A" (see the image below). The only thing you need to watch are enemies spawning from a hidden door behind you—mostly Legionaries and War Beasts, but sometimes a Gladiator will sneak up. Keep your head on a swivel, and you'll be golden.
What Loadout Should You Bring?
Even in 2026, the classics are still top-tier for this Lost Sector. Here's what I recommend:
-
Power Weapon: A machine gun (like Thunderlord) or a rocket launcher with tracking. If you have Gjallarhorn, even better—wolfpack rounds make quick work of the boss.
-
Energy Weapon: An SMG or auto rifle for melting adds. Bonus points if it has Voltshot or Incandescent.
-
Kinetic Weapon: Witherhoard is a beast here. Pop a blight on the boss and watch his health melt while you deal with ads. If you don't have Witherhoard, Osteo Striga is a stellar alternative—the poison tick damage is no joke, and it clears red bars in a flash.
-
Grenade Launchers: If you're using one for add clear, Dead Messenger is fantastic. Wave frames just sweep through everything.
Honestly, you can't go wrong as long as you have something to burst down the boss and something to keep those war beasts off your back.
Wrap-Up
And that's it, folks! Gilded Precept is so straightforward that after your first clear, you'll be speedrunning it in under five minutes. Whether you're farming for new exotics, completing the Strider quest, or just showing off to your fireteam, this is the Lost Sector to do it in. The safe spot in the boss room is a game-changer, so don't miss it.
If this guide helped you out, share it with your clan and keep grinding, Guardians. The loot ain't gonna collect itself!
Discussion